Get your shoes organized
Whether you’re moving to your new home or in need of organizing your belongings, everybody loves to save money if possible. So, why not learn to save some cash but do things yourself? It’s easy to kick around shoes but difficult to keep them organized. For this reason, we want to quickly explain how you can make a shoe rack. After Cinderella tried on the magic slipper she bought many, many a pair. We know that for certain because we used to live in her walk-in. And, we’ve seen her horse-drawn carriage at Central Park, boxes piled to the sky. In any event, let’s get to it. Here’s how you can save some space and keep those kicks in a line.
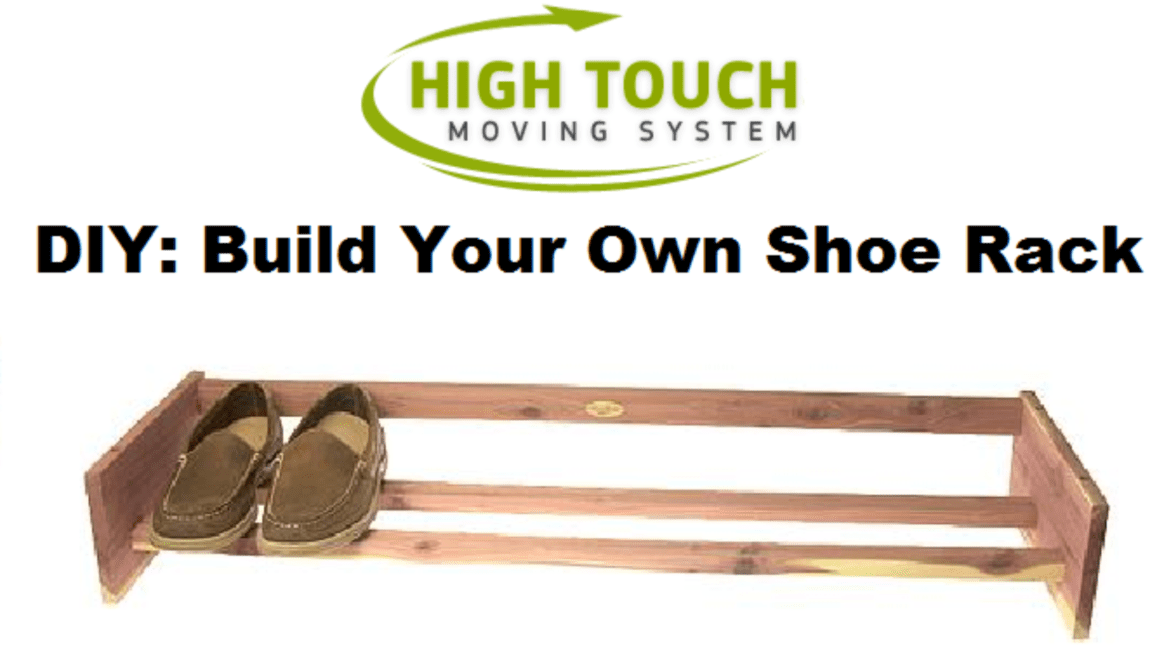
Here is what you will need:
-
A small saw
-
Wood Glue
-
Chisel
-
A piece of wood cut to these dimensions: 1-inch by 10-inches by 24-inches
-
Two other pieces of wood, cut to 1 and 1/2 inch by 1-inch by 48 inches
Now this is what to do next:
Step 1
You’ll have to make the two end pieces. You’ll accomplish this by cutting the first piece of wood in half and into two identical triangular pieces. Measure the piece at 11 inches at the perpendicular side and saw at that point.
Step 2
You will make the rails. Cut each of the second pieces of wood in two lengths at 1 and 1/2 inch by 1 inch by 24 inches. After this, you should have four identical pieces.
Step 3
You will make the rebates. On the rails, at 2.5 centimeters from the ends, mark them. Use your saw to cut them wide enough so that the end piece can fit properly in place. And, cut the pieces deep enough (at 1.27 centimeters) so they may sit plumb. With the chisel smooth down the cut.
Step 4
Putting the rails into place. If they don’t fit correctly, make the necessary adjustments with your saw. When they do fit correctly, apply the wood glue and let it sit until it dries.
Step 5
Let the glue dry and voila! You just built your own shoe rack!
1 Comment